
This is the final entry in a 3-part series about the planning and construction of a custom leather chef’s knife roll. To view just the photos, visit the gallery on Facebook.
Part 1: Discovery and design
Part 2: So, all you have to do is cut out some leather…
Part 3: Getting a handle on things
Getting a handle on things
I put aside the main roll at this stage, and concentrated on the handle and accessory area.
My client and I had discussed a bit of personalization such as stamped or engraved initials, and I thought a nice wooden accent would be a refined touch, so I picked up a thin slab of black walnut and went to work with the belt sander. I chose a font and style, set up a vector file with the personalization, and brought it in to a local place that does custom laser engraving (Toronto Laser Services). These were great guys to work with, and turned it around in less time than expected. They were interested to see how it would be used in the end product, as all I gave them was the piece of wood—my project was simply called “the stick.”
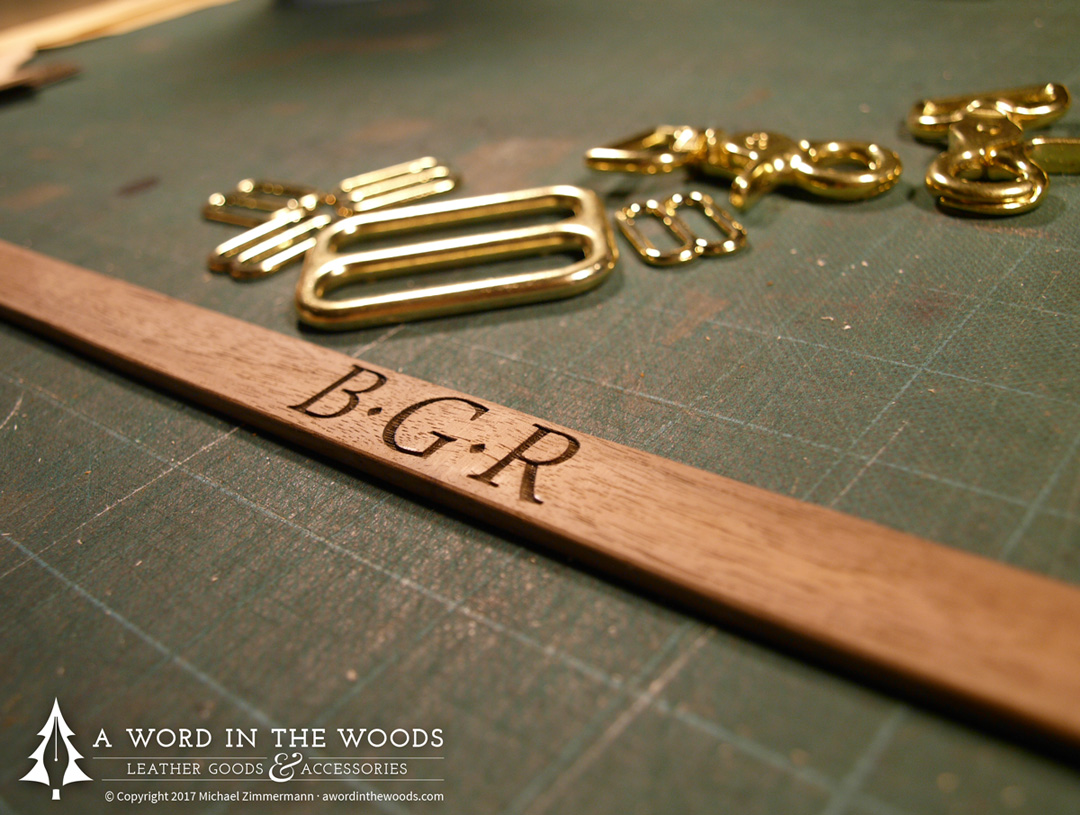
The laser-engraved walnut would be a perfect complement to the brass hardware.
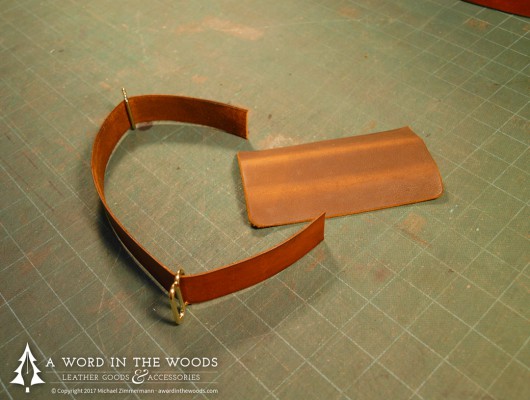
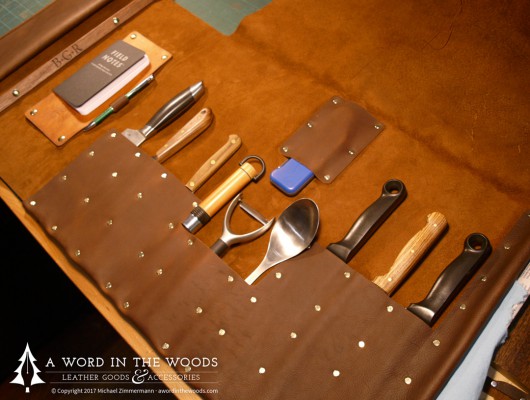
Turning to the spot between the knife slots and the handle, I wanted to add an area that would allow for future add-ons, like a snap-in custom tool holder or pouch. I decided on a stiff, vegetable-tanned panel that would provide a platform for a notebook and pen for now, but could also serve as a replaceable module in the future. I cut out the panel and rounded the corners, but held off punching the holes just yet.
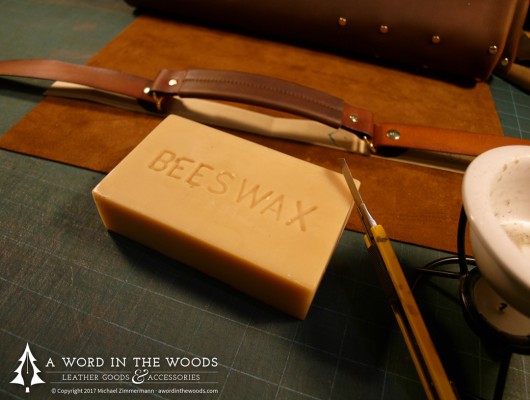
I wanted something to contrast and complement the rustic nature of the main piece of leather, so mixed up some light-brown dye and coloured the panel, as well as some 1” wide strips of the same veg-tan leather, set them aside for a few hours to dry, then buffed them well and did a second coat. I buffed them again to remove any remaining pigment and then melted up a combination of mineral oil and local beeswax from Mike Wood at Knotty Coppertop to finish the leather pieces and the wooden stay.
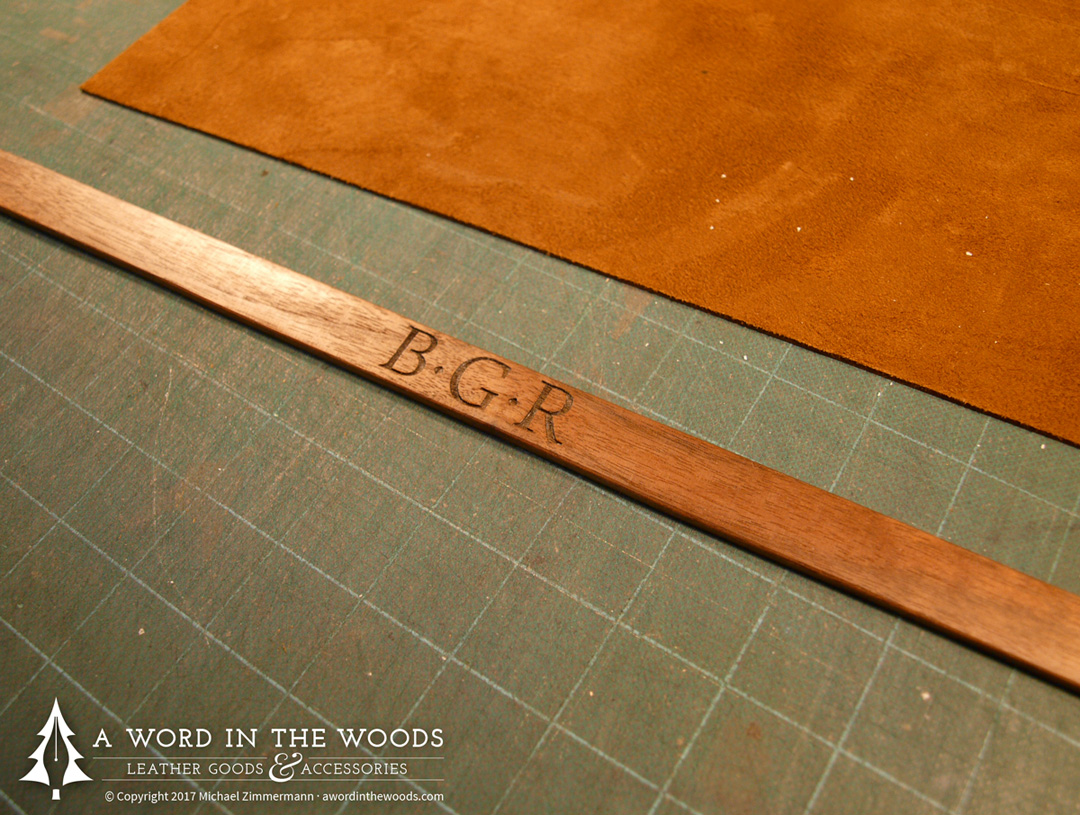
The darkened wood, now oiled and waxed, and ready for the holes to be drilled.
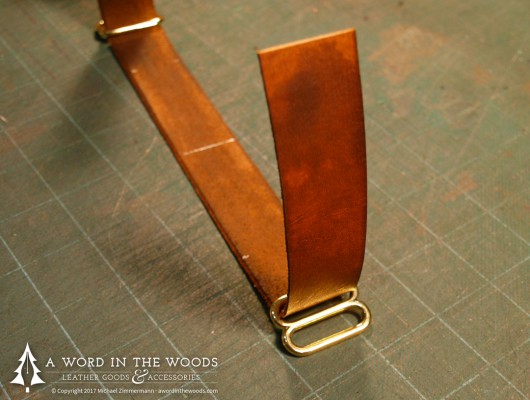
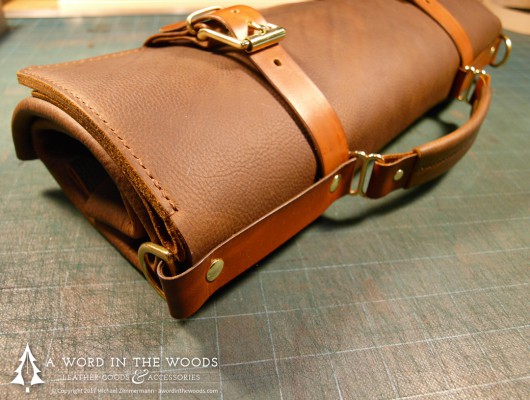
I cut off a 15” length of the vegtan strip, folded each end over a brass slider, and glued the ends into place in the centre to form the core of a grab handle. The grip part itself was formed and held together with contact cement, then hand stitched in place. I added two brass rivets for accent and to cinch it nicely to the hardware.
Two more strips would make for the webbing on the top spine of the bag, each trimmed with a strap-end cut (the gothic arch curve that I’m fond of using on many of my designs). On either end, they would wrap around a solid brass D ring (for a shoulder strap) and secure to the wooden stay (also finished with beeswax), serving both functional aesthetic roles.
-
- The core of the handle.
-
- The veg-tanned core, ready to be attached to the soft, oil-tanned grip.
-
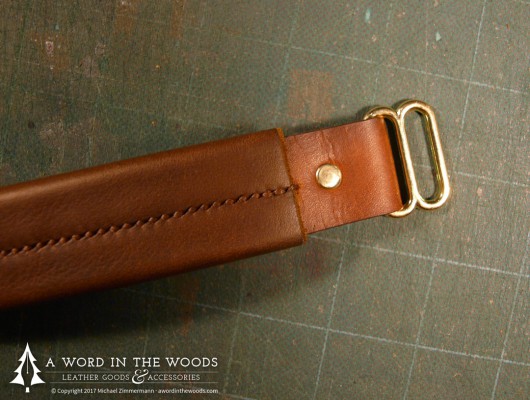
- The loops are riveted, and attached to brass sliders.
-
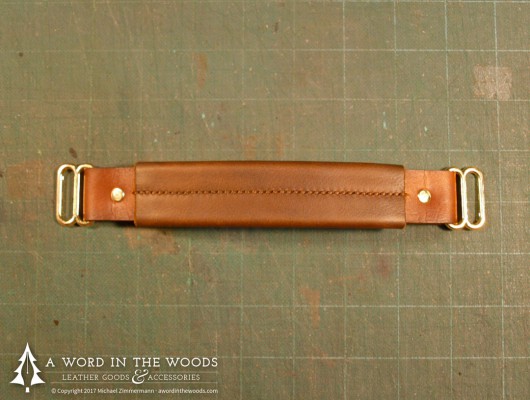
- The final handle with grip, hand-stitched in place.
-
- The handle, attached to the top straps that will attach to the bag… and a huge block of new beeswax.
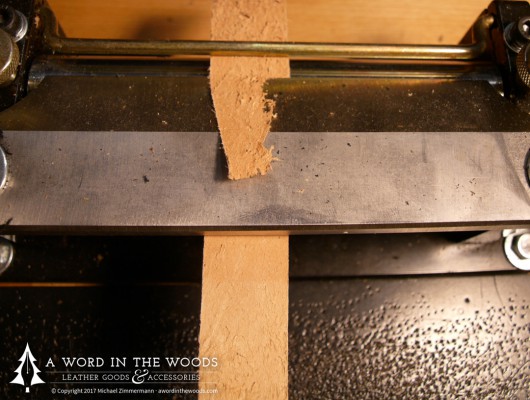
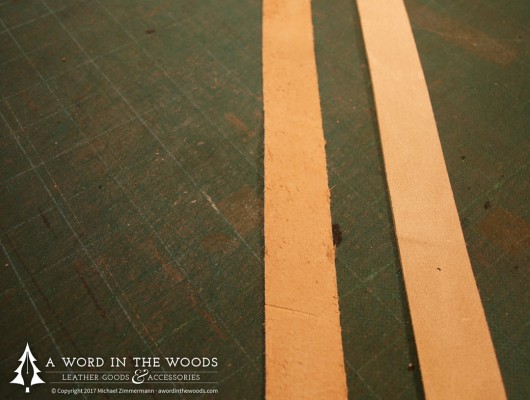
While the full-grain vegetable tanned leather I was using for the other bits was strong enough, I wanted to make the belts a little thicker. I took some overly thick leather and ran them through a splitter, both smoothing and thinning it to just the right weight.
I then dyed the belts in a similar fashion to the other parts, and rounded and lightly burnished the edges. The edges of the belt will get wider as it gets used, so this chamfer is important to the profile of the belt. I punched a slot for the tongue of each solid brass buckle, and secured the buckle and brass keeper in place with two more brass rivets.
-
- Cutting straps from raw vegtan leather.
-
- Splitting the straps down to a specific custom thickness.
-
- Before and after: straps are now smoother and more consistent.
-
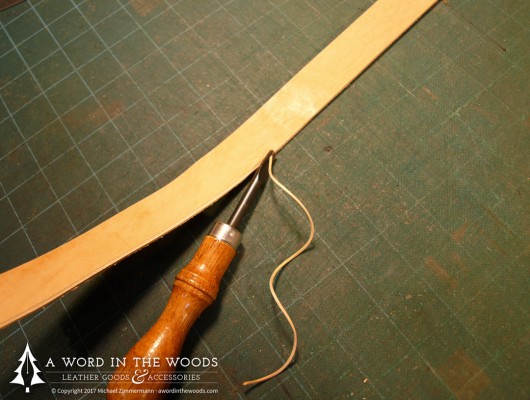
- Rounding the edges of each strap.
Accessorize
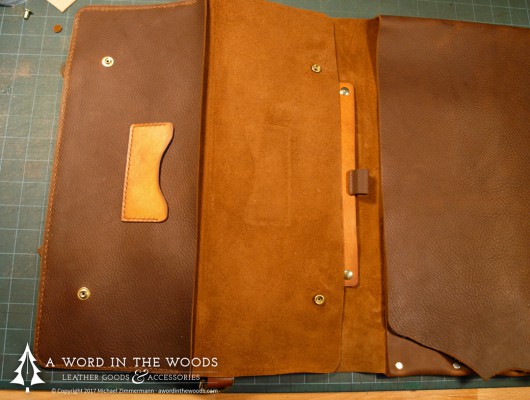
The accessory panel, the handle, and the stay would all attach to the main roll by chicago screws (made of—you guessed it—solid brass). This was important in case any changes, repairs, or expansions needed to be made in the future. My decision to hold off on punching the accessory panel holes paid off, as I modified my initial design measurements to allow for a more natural handle position, and this meant that the final belt positions would be moved slightly. I decided to attach a loop behind each of the four accessory panel points that would guide the belts around the closed roll.
The wooden stay and handle assembled in place, next to the removable accessory panel and pen loop.
I left the cover flap decisions for last. I was worried that the roll would be overly heavy, but it was actually quite manageable. Don’t get me wrong, it’s about 9-11 sq.ft of oiled leather with a lot of solid brass, so it’s got heft, but it wasn’t yet to the point where it felt unwieldy, in my opinion.
I decided I could add a nice large pocket under the main flap, so I cut out a 7×16” and a 13×16” piece out of the remaining leather. I also added a cardholder out of the light brown vegtan that would rest under the flap. I added two Line 20 snaps, and glued the pocket in place to the end of the main roll. Once the glue set, I trimmed the edges, and rounded the corners by hand in my usual fashion, and hand stitched the big pocket in place. It’s always awkward stitching large items, but in this case, it was helpful that the roll was so large, as it kept its shape somewhat and didn’t flop around as much.
-
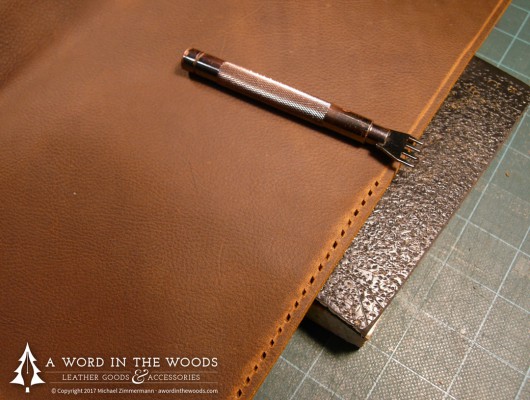
- Punching the stitching holes in advance to ensure consistent spacing.
-
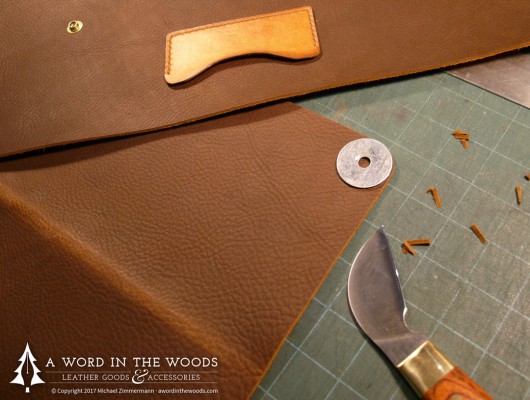
- Rounding each corner with a series of small cuts.
-
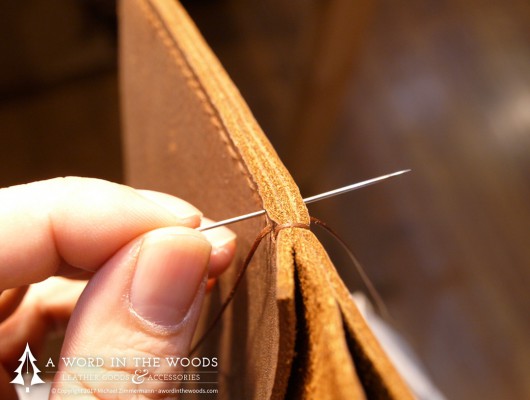
- Hand stitching the accessory pockets with waxed, braided thread.
-
- The final pocket, complete with a slot for business cards.
Ready? Go set.
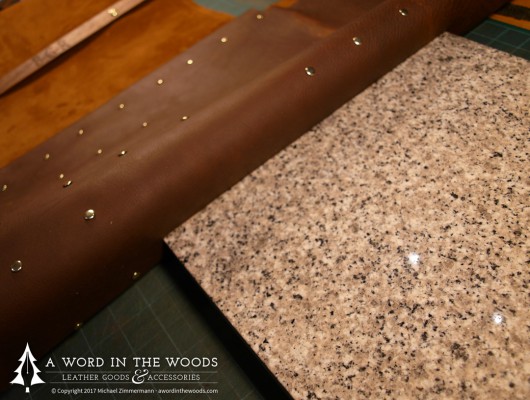
With the roll finally cut, measured, assembled, fit, tested, and fit again, I took out my polished granite block and set all 54 brass rivets. I populated the roll with my own knives, and rolled it up to make the final measurements on the belts, and cut them to the appropriate length.

In order to get exact spacing on the belt holes, I took to Illustrator again and made a quick template for nine fairly closely spaced holes so that there would be enough fine adjustment. I made a template from cardboard, and then marked and punched the holes.
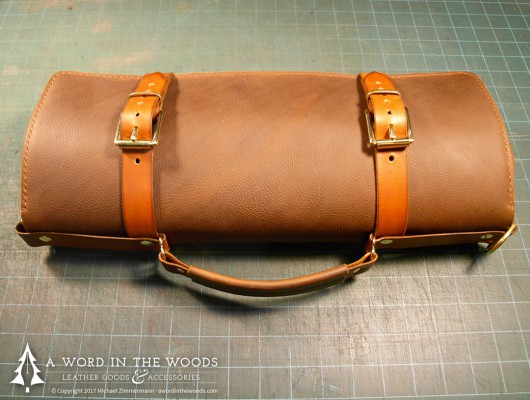
I threaded the belts, secured them under the handle, and I was done! All that was left was to write up a little product insert for care and use and brush the entire thing with a soft horsehair brush.
It was tough letting go of this one, as it had turned out as good as I could have hoped, but both my customer and the end recipient seemed very happy with it as well, and that makes every calculation and cut worthwhile.
I’ve asked the new owner for some “in the wild” shots, and I’ll update this post with those photos when I get them.
This is the final entry in a 3-part series about the planning and construction of a custom leather chef’s knife roll.
Part 1: Discovery and design
Part 2: So, all you have to do is cut out some leather…
Part 3: Getting a handle on things